Why Apple ID is UseFull.?
How to create an Apple ID Without Credit Card on your Mac our Apple ID is the account you use to access Apple services like the iTunes Store, App Store, iBooks Store, iCloud, iMessage, Apple Music, Apple News, or Podcasts. You can sign in to all Apple services with a single Apple ID and password.
To purchase and download content from the iTunes Store, you need an Apple ID. Your Apple ID is the account that you use to access Apple services. If you’ve used other Apple services such as iCloud, or bought apps from the Mac App Store or items from the Apple Online Store, you don’t need to create a new Apple ID. Just sign in to the iTunes Store using that same Apple ID.
How to create an Apple ID using iTunes
- Launch iTunes from your Dock or from the Finder.
- Click Account on the right under Music Quick Links.
- Click Create Apple ID.

- Click Continue.
- Click the checkbox to agree to the terms and conditions (after having read them, of course).
- Read and agree to the Terms and Conditions and Apple Privacy Policy.
- Complete the form to create your new Apple ID. The email address you provide will be your new Apple ID. The form also includes security questions for your protection.
- After you’ve filled out the form, click Continue.
If you see a message that says that the email address you entered is already associated with an Apple ID, follow these instructions to use an existing Apple ID instead. - Enter your credit card and billing information, then click Continue. We’ll charge you only when you make a purchase. You can change or remove your payment details later.
- Check your email for a verification email from Apple and follow the steps to verify your email address.
After you verify your email address, you can sign in to the iTunes Store and other Apple services such as iCloud with your new Apple ID.
Use your iPhone, iPad, or iPod touch
- Open the iTunes Store App.
- Scroll to the bottom and tap Sign In.
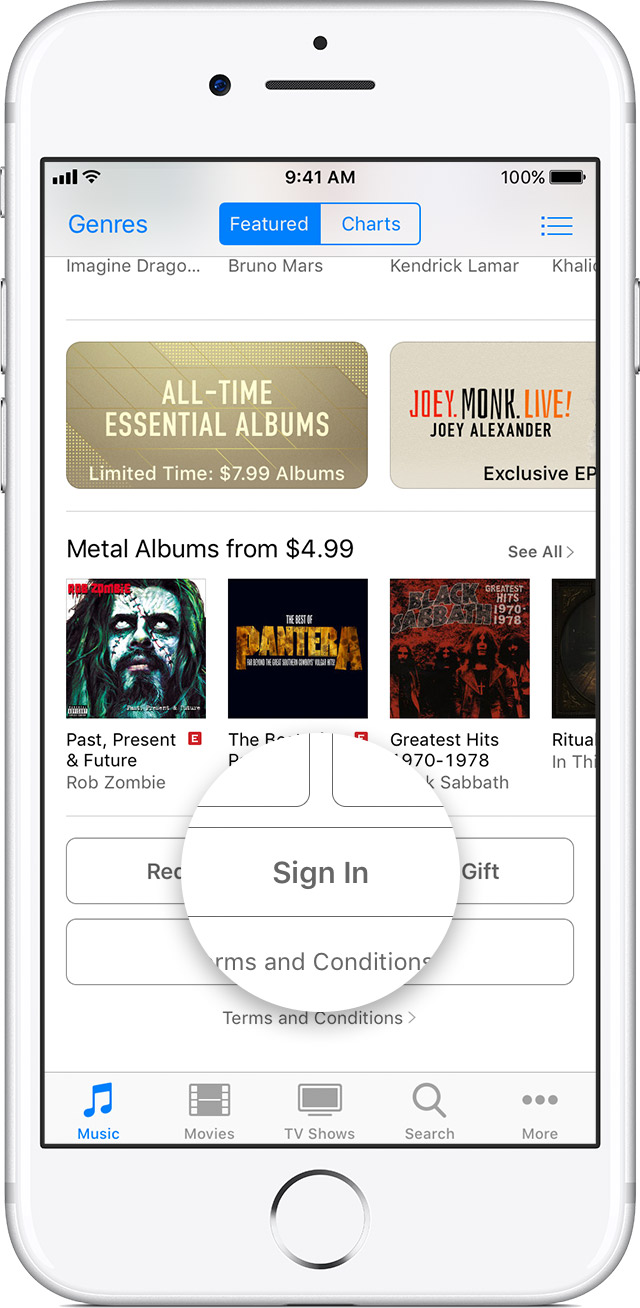
- Tap Create New Apple ID.
- Choose the country or region that matches the billing address for your payment method, then tap Next.
- Read the Terms and Conditions and Apple Privacy Policy, then tap Agree. If prompted, tap Agree again.
- Complete the form to create your new Apple ID, then tap Next. The email address you provide will be your new Apple ID. The form also includes security questions for your protection.
If you’re trying to create an account using an existing Apple ID, you’ll see a message that the email address you provided is already an Apple ID. Tap Continue, then tap Use Existing Apple ID. - Enter your credit card and billing information, then tap Done. You will not be charged until you make a purchase. You can change or remove your payment details later.
- Check your email for a verification email from Apple and follow the steps to verify your email address. Learn what to do if you need to set up email on your iPhone, iPad, or iPod touch.
After you verify your email address, you can sign in to the iTunes Store, App Store, and other Apple services such as iCloud with your new Apple ID.
How to create an Apple ID using the Mac App Store
- Launch the App Store from your Dock or the Finder.
- Click Account on the right under Quick Links.
- Click Create Apple ID.

- Click Continue on the welcome page.
- Click the checkbox to agree to the terms and conditions (after having read them, of course).
- Click Agree.

- Enter all of the information that’s asked for on the screen. The email addressand password you enter will be your Apple ID, so don’t forget them!
- Click Continue when you’re finished.
- Enter your billing information. You can choose to add a credit card now, but you don’t have to.
- Click Create Apple ID.

You will receive a verification email from Apple. Click the link in the email and your Apple ID will be activated and you’ll be on your way to apps, music from iTunes, iCloud storage, and more!
Article Source : Apple , iMore.com
images CopyRight , iMore.com and Apple.com
Thanks For This